|
10/23/2017 0 Comments Sgraffito
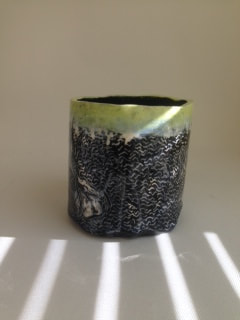
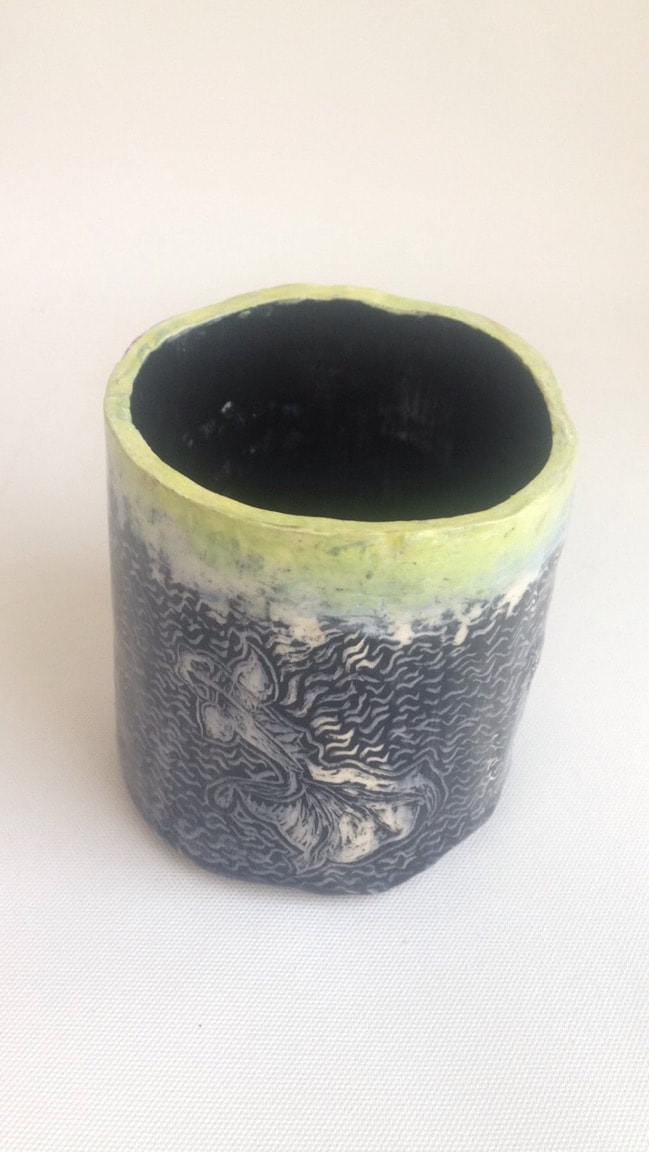
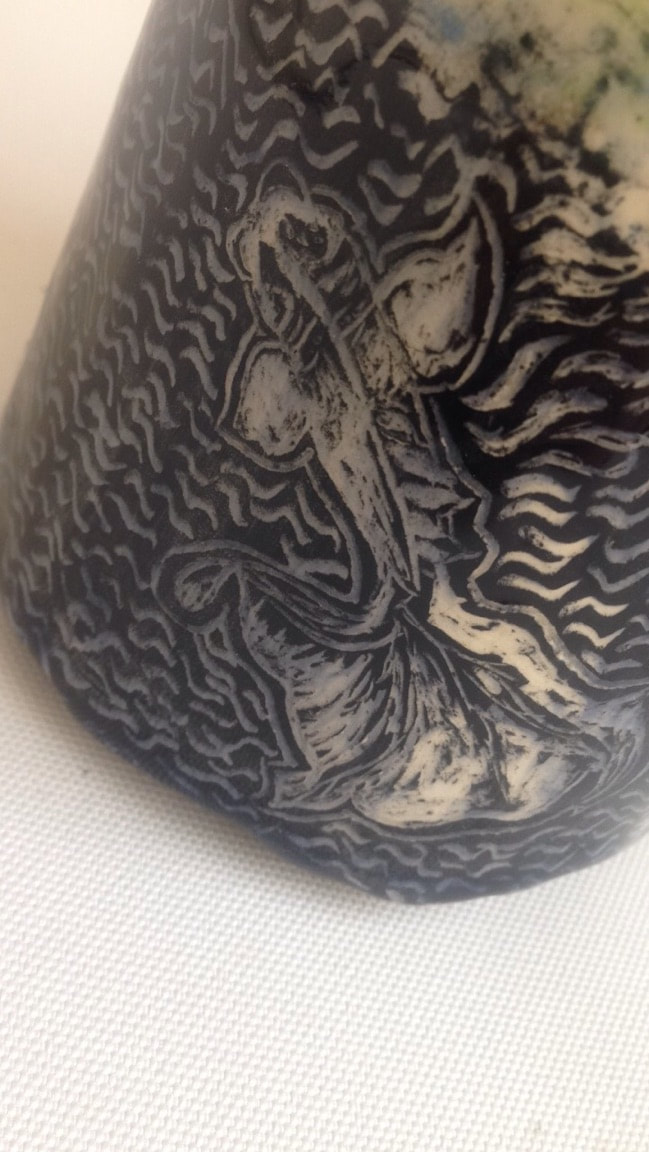
I got my idea from seeing so many photos of sgraffito pieces with different types of fish. I thought the fish were all so pretty. I noticed on pinterest many of the sgraffito pieces where pots holding succulents and because I have my own plants, a small pot for them could be useful. Once I received my clay, I found it really difficult to wedge, I finally was able to remove the air bubbles and roll it into a even shape (after realizing that it stuck to the tables). Then I was able to roll it onto the pipe and use scoring and slip to add the base piece. I found it difficult to keep the clay smooth and took multiple attempts to do so. I also tried multiple times to round the edges and keep from from being too sharp. 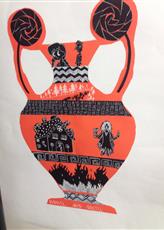 For the Greek sgraffito piece we made a Volute Krater. These were used to store ashes if the story told on them was about death (ie. Hades) or used to store oils, grain, and wine with other tales. The story on our vase was about Hansel and Gretle and the witch. I worked on creating the fire, coloring hansel and Gretle, and made Hansel. Sgraffito is scratching clay covered in a black under glaze to create marks. Registers are the rows on the vase that each have a scene of the story or design. FINISHED PIECE: The process of my piece was wrapping wedged clay around a tube covered in paper. Creating a cylinder using scratch and slip method and applying the bottom the same way. When hardened I added a layer of black undercoat. When it dried i scratched out the patterns of fish and water. I also scratched the top and added glaze to create a water look. After this We had it put in the kiln and then glazed and put in again. I thought that the process was really cool. I found it really satisfying to scratch off the under glaze and make designs. I really enjoyed making this piece. My piece was successful in the colors and pattern. It was not successful in how I applied too much of the clear glaze and it got stuck to the kiln and I have to use the hammer to break it off, and repaint my pieces broken parts. Which lengthened the process.Next time I would be more successful if I was more careful with applying this and making sure none is on the bottom.
0 Comments
10/17/2017 0 Comments Paper Project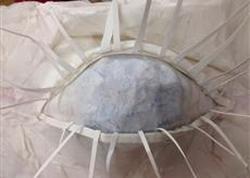 Mini project: I found that the use of glue was difficult. Sometimes it was hard for the shapes especially when large part had to be bent to stick together. I also found it difficult for shapes to look good from all angles. I found the final result successful. Especially how the piece looked from different sides and the cut out shapes after being bend or moved. 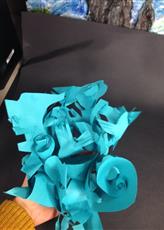
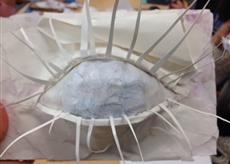
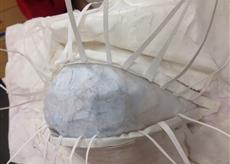
 These two pieces had lots of progress. With the eye I started with a layer of cardboard and used strips of it to create a mound shape. After created the mount i started layering on paper with watered down glue. After the layers hardened I added details in large dry paper pieces before following up and covering those too in gluey paper. The mask started out as a blank mask. I used hot glue to raise the tip of the nose, eyebrows,and cheeks, as well as the mouth area. Afterwards I started layering up the glue/water paper on the specific areas and elongated the chin. The most difficult part of the eye, was being patient with the glue drying, and shaping wet glue to stay the way i wanted it to. The most difficult part of the mask was attempting to create symmetry and keeping the paper from sticking up around the cardboard covering the eye holes. The eye piece was difficult in attempting to make the eye shape round, yet natural. Yet, it was successful. The eye shape looks quite real and I am happy with the outcome. As for the mask I was successful in achieving the creepy look using the cardboard over the eyes and making it look symmetrical. 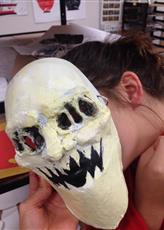 |
AuthorWrite something about yourself. No need to be fancy, just an overview. Archives
January 2018
Categories |

 RSS Feed
